Create a Film Artwork Design
Updated Last updated: May 4, 2026
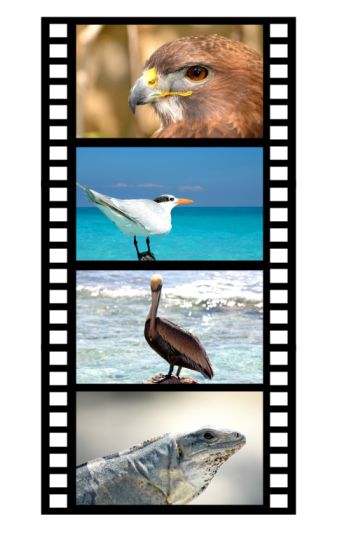
Learn how to create a filmstrip artwork design with photos inside using Photo Pos Pro.
Step-by-Step Guide
1. Create a new blank image
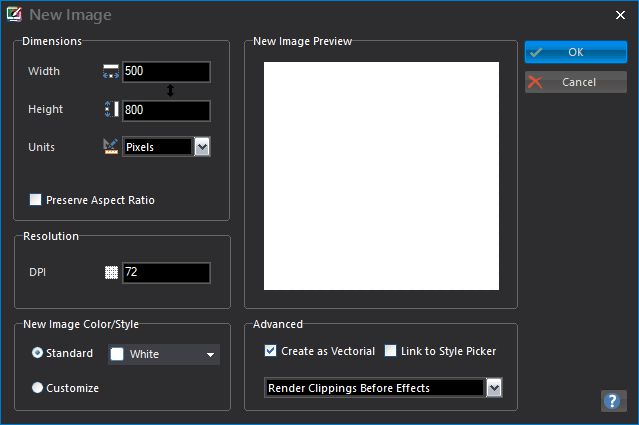
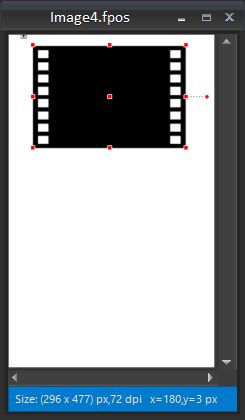
Create a new 500 x 800 blank image using File → New → Blank Image.
2. Choose the Common Shapes tool
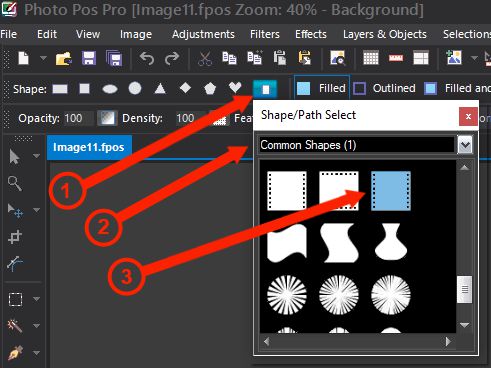
From the left toolbar, choose the Common/Pre-made Shapes tool.
3. Select the film shape
Open More Shapes, choose Common Shapes (1), and select the film shape.
4. Set the shape color
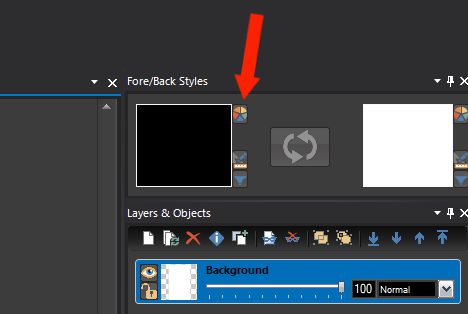
Set the Fore Color/Style to black.
5. Draw the first film piece
Use the mouse to draw one filmstrip shape.
6. Copy the film piece
Press Ctrl + C or use Edit → Copy.
7. Paste and position the copy
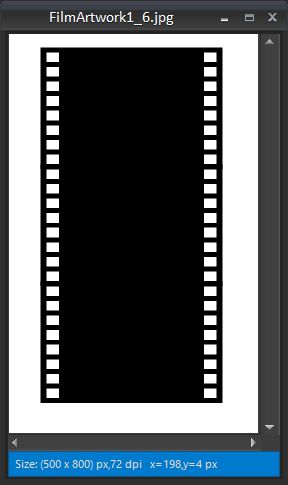
Press Ctrl + F or use Edit → Paste Into Current Image, then drag the copy into place.
8. Create a long filmstrip
Repeat the paste operation one more time to create one long filmstrip.
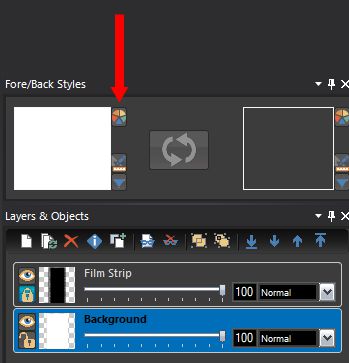
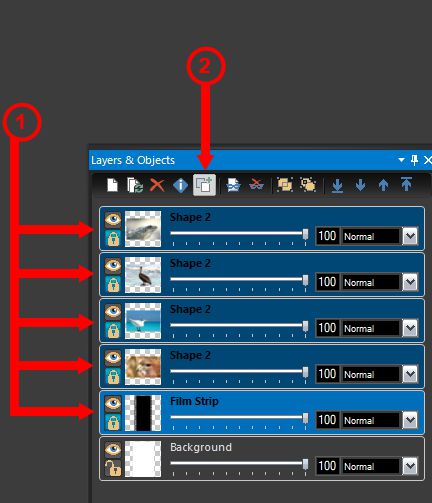
9. Select the filmstrip layers
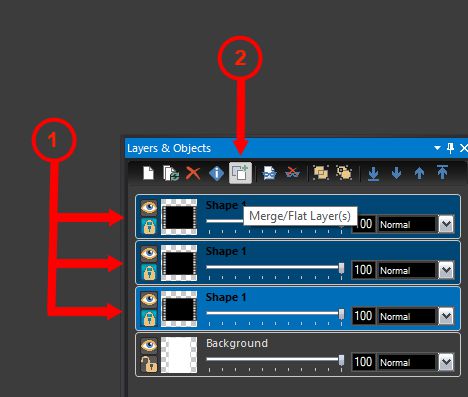
In the Layers & Objects panel, select the three filmstrip shape layers using Ctrl-click.
10. Merge the filmstrip layers
Click the Merge/Flat Layers button to merge the three film pieces into one layer.
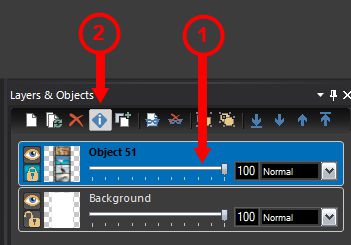
11. Rename the layer
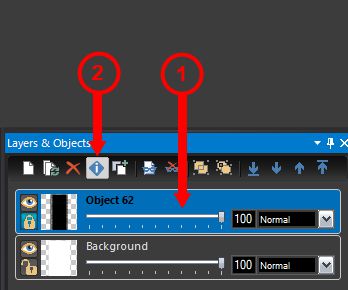
Select the merged filmstrip layer, click Item Info, and rename it to Film Strip.
12. Select the rectangle shape
For the second stage, select the Rectangle Shape from the shape properties toolbar.
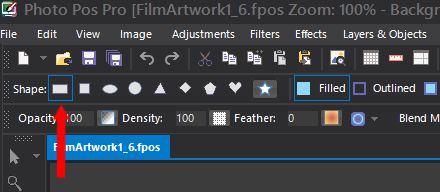
13. Set the rectangle color
Set the Fore Color/Style to white.
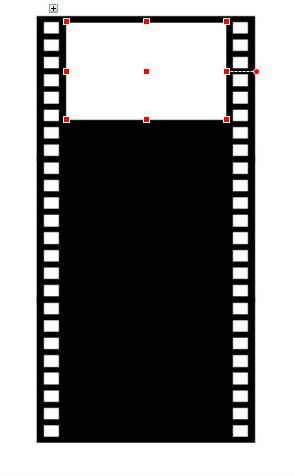
14. Draw a photo placeholder
Draw a blank white rectangle that will later be filled with a photo, then move and resize it into place.
15. Copy the rectangle
Press Ctrl + C or use Edit → Copy.
16. Paste another rectangle
Press Ctrl + F or use Edit → Paste Into Current Image, then drag the copy into the next position.
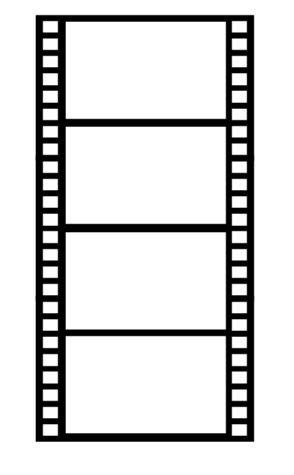
17. Create four photo placeholders
Repeat the copy and paste process until the filmstrip contains four blank white rectangles.
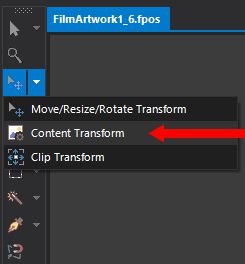
18. Choose Content Transform
Select the Content Transform tool so you can fit images inside the rectangles.
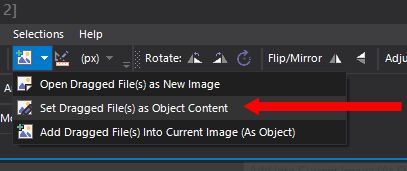
19. Set dragged files as object content
Open Dragging Files Options and select Set Dragged File(s) as Object Content.
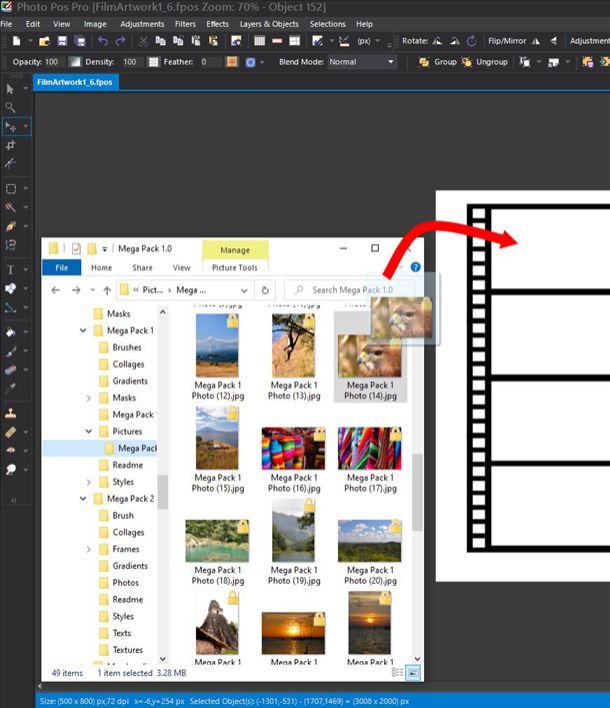
20. Drag a photo into the first rectangle
Open Windows File Explorer, choose a photo, and drag it into the first blank rectangle.
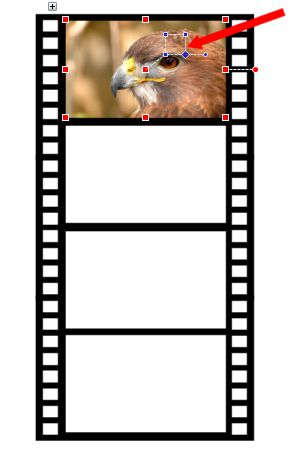
21. Fit the photo inside the rectangle
Click the rectangle and use the blue interface to resize, rotate, or move the photo content.
22. Fill all rectangles with photos
Repeat the drag-and-fit process for each blank rectangle until the filmstrip is filled with photos.
23. Select all filmstrip content layers
Using mouse while holding the shift key select the four photo rectangle layers and the filmstrip layer, leaving only the background unselected.
24. Merge the photo and filmstrip layers
Click Merge/Flat Layers to merge the five selected layers into one filmstrip layer.
25. Rename the final filmstrip layer
Select the merged layer, open Item Info, and rename it to Film Strip.
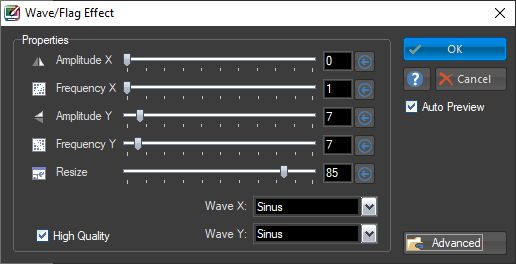
26. Apply the flag deformation
Make sure the Film Strip layer is selected, then go to Effects → Deformations → Flag and set the values shown in the original tutorial.