Remove Unwanted Objects with the Clone Brush
Updated Last updated: May 4, 2026
Learn how to remove or hide unwanted objects in a photo using the Clone Brush tool in Photo Pos Pro.
Step-by-Step Guide
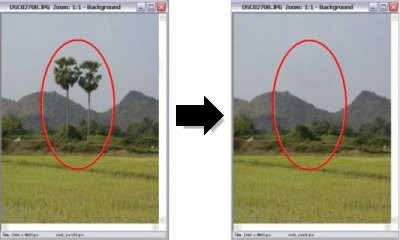
1. Review the object you want to remove
Start by identifying the unwanted object or detail in the photo. The Clone Brush works by copying a similar nearby area and painting it over the object you want to hide.
2. Open your photo
Open the photo you want to edit. Go to File → Open, or press Ctrl + O.

3. Select the Clone Brush tool
From the Tools toolbar, choose the Clone Brush tool.
4. Choose a cloning source
Right-click an area of the image that looks similar to the background around the unwanted object. This area will be used as the cloning source.
5. Paint over the unwanted object
Move the mouse pointer over the unwanted object, hold the left mouse button, and gently paint over it. The selected background area will be copied over the object.

6. Repeat until the object disappears
Repeat the cloning process as needed. Choose new source points when necessary so the repaired area blends naturally with the rest of the photo.

7. Adjust brush settings if needed
Use the tool properties toolbar to adjust the Clone Brush size, opacity, and other settings for better control and a smoother result.